Best Float Valve Concrete Tank Options
I wanted to continue on our series about the setups for different kinds of livestock tanks. Best Float Valves function superbly well no matter the tank setup, but there are some differences in the installation. For this one, I wanted to look at concrete tanks. They are pretty straightforward, but I want to set you up well if I can.
If you are plumbing from the bottom of the tank, we shy away from hooking the valves to PEX or PVC pipes because of the torque the lever can apply to the pipe. They are also more easily broken by livestock. Instead, transition from PEX or PVC under the concrete to a stainless steel or brass pipe nipple that extends into the tank to the float valve. Do not use galvanized pipe nipples because they can corrode rather quickly due to chemical reactions with the concrete. We recommend that the pipe nipple extend approximately 3" from the top of the concrete for valves with a straight arm. If your pipe comes up higher (less than 6" from the top of the water), any of our float valve kits can come with a bent arm. This will allow the valve to be as low as possible in the water and still permit the valve to open fully. With the bent arm, the pipe nipple can extend approximately 5".
If your plumbing is coming in from the bottom side, we have a 90° arm that can be added to our valves to allow it to plumb in that direction. For stainless valves, email shannon@bestfloatvalve.com to have that added to your order.
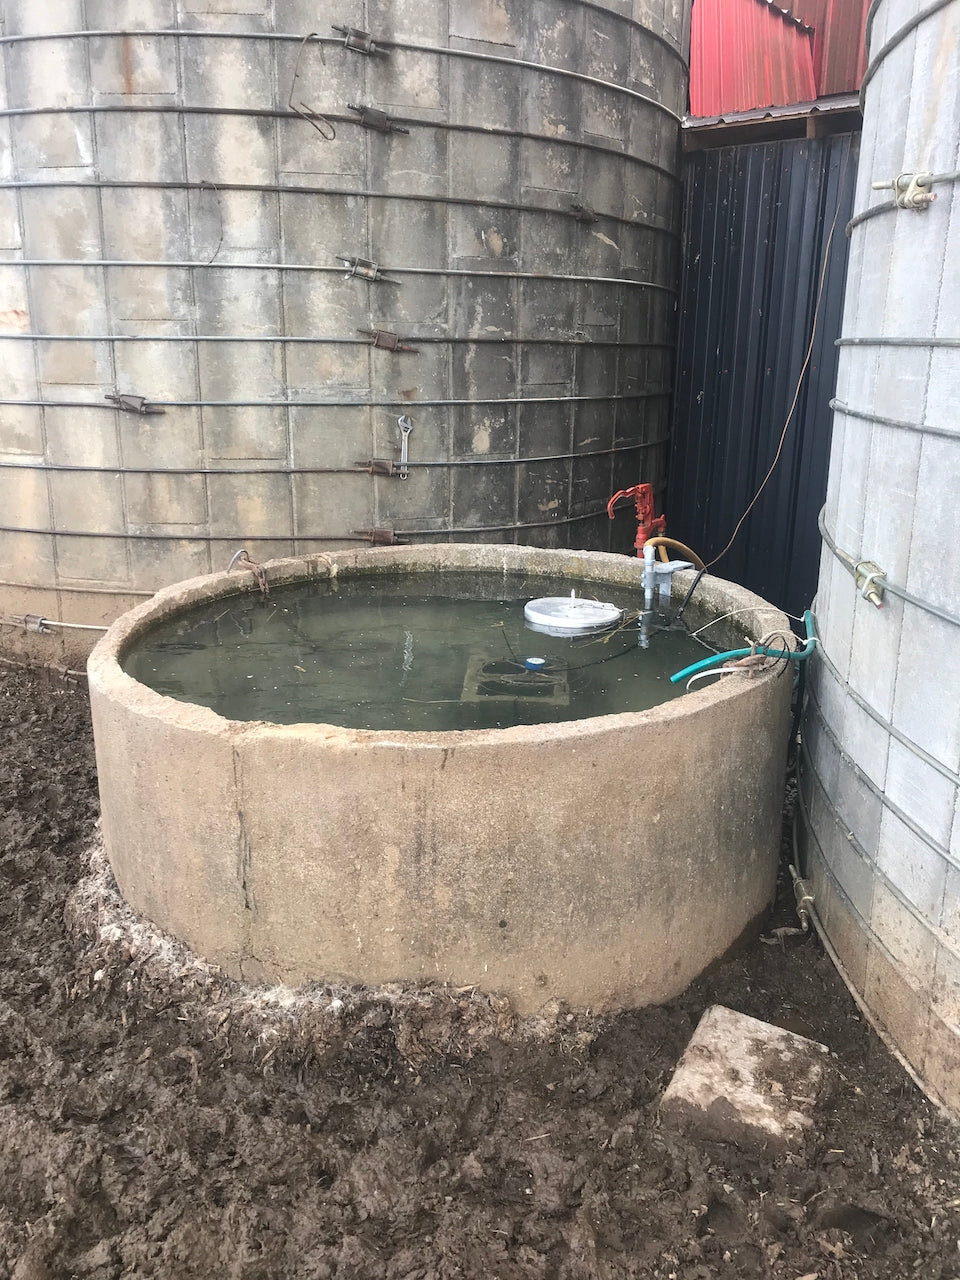
Some need to come from the top side of the tank, like the main picture in this blog. Our Side Mount Kits are an extremely durable solution for that situation. Measure your tank(s) at the widest part of the lip to determine what size will suit. They come in multiple sizes for your convenience and can pair with our high volume or standard valves. If your pressure is pushing 90 psi, then we recommend sizing up on the floats to handle that. The side mount kit loses some of the capability for pressure of the kits mounted from the bottom. The 12"x4" pan float will help if needed. Contact us with questions.
A drain pipe is not absolutely necessary, but if it is convenient, go ahead and put one on in especially if you are using our ice prevention products. It will be easier to clean the tank and you won't have to siphon or pump it out.The standard level for an overflow pipe is 1-2" from the top of the tank, or full if the wind won't bother it. If you are going to use our ice prevention products, it will help prevent some messes during the coldest months to have one. The below picture is using our Micro Sweeper.

For the height of the float, shoot for setting to be 2/3 underwater in high pressure. We have barrel floats and pan floats. The barrel floats pictured below are our most basic float and function up to 90 psi in our standard kits. Our Best Float High Volume Valve Kits use a barrel float as well. Our pan floats are adjusted from the top of the water and perform better in highly windy areas. The pan floats (pictured above) allow for higher pressure up to 180 psi.


Once installed the only semi-regular maintenance will be the poppet washers. Some replace them every 6 months, some every 3-5 years. If you start to have a little overflow, these will fix the problem 9 times out of 10.
Here's our page of Float Valve Kits so that you can the float valves for your particular livestock situation.
As always, if you have questions, please contact us. We love getting to serve and helping you get set up for success.


